320x100
리엑트는 크게 functional type , class type으로 코드를 짤 수 있는데, 이번 프로젝트에선 functional type으로 짤 계획이다.
Component란?
react component는 props(옵션들 이라 생각하면 될듯 하다.)을 인자로 받아서 React Elements(HTML Elements)를 조합하는 것이라고 생각하면 될듯하다.
느낌상으로는 화면에 표현되는 것들을 class화 시켜서 개별적으로 개발한뒤 묶는 느낌이다.
Components 만들기
먼저 src폴더에 components를 모아둘 components directory를 생성한다.
MainContainer
Device list, Device data들을 보여줄때 기본적으로 보여질 index , 빈화면을 나타낼 component이다.
- MainContainer.js
import './MainContainer.css'
import { Index } from './index/Index';
import { useEffect, useState } from 'react';
import { Content } from './content/Content';

export const MainContainer = (props) =>{
  const [items, setItems] = useState(props.items);
  const [contents,setContents] = useState();

  useEffect(() => {
    items.forEach(item => {
      if(item.on){
        setContents(item.contents)
      }
    });
  })

  const onIndexButtonClick = (event) => {
    const newItems = items.map(item => {
      if(item.name == event.target.innerText){
        setContents(item.contents);
      }
      return {
        "name": item.name,
        "on": item.name == event.target.innerText,
        "contents": item.contents
      }
    });
    setItems(newItems);
  };

  return (
    <div className="MainContainer">
      <Index items={items} onClick={onIndexButtonClick}></Index>
      <Content>
        {contents}
      </Content>
    </div>
  )
}
- MainContainer.css
.MainContainer {
  position: absolute;
  width: 100%;
  height: 100%;
}

.MainContainer .Index{
  position: absolute;
  width: 10%;
  height: 100%;
  background-color: darkorange;
}
- 설명
- useState()
- React에서는 State관리가 중요하다. state까 바뀔 때 마다 해당 component가 다시 랜더링 되기 때문이다.
- 반대로 특정 component를 다시 랜더링 하고 싶다면 useState()의 return값으로 나오는 것중 2번째인 state재설정하는 함수를 통해 state를 업데이트하고, 화면을 다시 랜더링 시키면 된다.
- useEffect()
- React에서 화면이 component가 랜더링 될때 한번 실행되는 함수이다. 여기에는 화면이 새로 업데이트 될 때 해야 할 것들을 적어 놓으면 된다.
- props
- parent component에서 넘어온 인자들이 담겨있다. props가 변경되면 children component의 state가 변경된 걸로 되어서 화면이 다시 랜더링 된다.
- onClinck
- HTML 기본 기능중 하나인 onClick에 대해 처리할 함수를 props로 넘겨준다.
- <Index> , <Content>
- react에서 만든 component는 마치 HTML elements처럼 사용가능하다.
- useState()
- Index.js
import { IndexItem } from "./IndexItem"

export const Index = (props) => {

  const creatIndexItems = () => {
    return props.items.map(item => {
        return(
          <IndexItem key={item.name} name={item.name} on={item.on} onClick={props.onClick}></IndexItem>
        )
      }
    )
  }

  return(
    <div className="Index">
        <p className="header">Contents</p>
        {creatIndexItems()}
        <p className="footer">
          <a href="http://study.lachani.com/api">API Docs</a>
        </p>
    </div>
  )
}- IndexItem.js
import './Index.css'

export const IndexItem = (props) => {
  return(
    <div className={`IndexItem-${props.on}`} onClick={props.onClick}>
      {props.name}
    </div>
  )
}
- Index.css
.Index{
  position:fixed;
  width: 10%;
  height: 100%;
  background-color: darkorange;
}

.IndexItem-true{
  width: 100%;
  height: 50px;
  display: flex;
  justify-content: center;
  align-items: center;
  font-weight: bolder;
  font-size: 18px;
  text-align: center;
  margin: 0;
  background-color:tomato;
  color: aliceblue;
}

.IndexItem-false{
  width: 100%;
  height: 50px;
  display: flex;
  justify-content: center;
  align-items: center;
  font-weight: bolder;
  font-size: 18px;
  text-align: center;
  margin: 0;
  background-color:darkorange;
  color: aliceblue;
}

.Index .header{
  width: 100%;
  height: 70px;
  display: flex;
  justify-content: center;
  align-items: center;
  font-weight: bolder;
  font-size: 23px;
  text-align: center;
  margin: 0;
  background-color: chocolate;
  color: aliceblue;
}

.Index .footer{
  width: 100%;
  height: 70px;
  bottom: 0px;
  display: flex;
  position: absolute;
  justify-content: center;
  align-items: center;
  font-weight: bolder;
  font-size: 23px;
  text-align: center;
  margin: 0;
  background-color: chocolate;
  color: aliceblue;
}
- 설명
- Index(목차)에서는 item들의 list를 나타내주는 역할을 하고, IndexItem들은 현재 Container에 보여지는 목차에 따라 색이 다르게 하기 위해 css를 따로 만들어 주었다.
- Index의 item과 클릭했을 때의 행동을 parents component에서 설정하기 위해 onClinck function을 props로 받게 하였다.
- DeviceList.js
import { useState } from "react"
import { DeviceSmallContainer } from "./device-small-container/DeviceSmallContainer"
import './DeviceList.css'
import axios from "axios"
import { useInterval } from "../../util/useInterval"
export const DeviceList = (props) =>{
  const [devices, setDevices] = useState([]);

  useState(()=>{
    axios.get("https://device.lachani.com/v1/devices",{headers:{
      "Contents-type": "application/json"
    }}).then(res => {
      setDevices(res.data)
      console.log(res.data)
    })
  }, null);

  useInterval(() => {
    axios.get("https://device.lachani.com/v1/devices",{headers:{
      "Contents-type": "application/json"
    }}).then(res => {
      setDevices(res.data)
    });
  },200);

  const createDeviceContainers = () => {
    return devices.map(device => {
      return(
        <DeviceSmallContainer id={device.id} key={device.id} data={device} onClick={props.onClick}></DeviceSmallContainer>
      )
    })
  }
  return(
    <div className="DeviceList">
     {createDeviceContainers()}
    </div>
  )
}- DeviceList.css
.DeviceList{
  width: 100%;
  height: 100%;
  margin: auto;
}
- 설명
- React에서는 기본적으로 data를 API요청을 통해 가져온다.
- API요청을 axio를 많이 사용한다.
- useEffect로 화면이 변경돼서 랜더링 될때, API요청을 해서 데이터를 불러오게 했다.
- 서버에서 device가 추가되거나 변경돼도 어느정도 실시간으로 변경된 데이터를 확인하는 걸 간단하게 구현하기 위해 useInterval을 사용하였다.(실제 서비스에서 이렇게 사용하면 서버가 감당 하려나..) useInterval은 React 내부 함수가 아닌 다른 사람이 만들어 놓은 react에서 사용하기 위한 Hook이다.
- 그냥 setInterval을 useEffect에 사용하면 무수한 network 요청을 확인 할 수 있다.
- React에서는 기본적으로 data를 API요청을 통해 가져온다.
- useInterval.js
import { useEffect, useRef } from 'react';

export function useInterval(callback, delay) {
  const savedCallback = useRef();

  useEffect(() => {
    savedCallback.current = callback;
  }, [callback]);

  useEffect(() => {
    function tick() {
      savedCallback.current();
    }
    if (delay !== null) {
      let id = setInterval(tick, delay);
      return () => clearInterval(id);
    }
  }, [delay]);
}
다른 코드들은 특별한게 없으니 git hub을 참고하길 바란다.
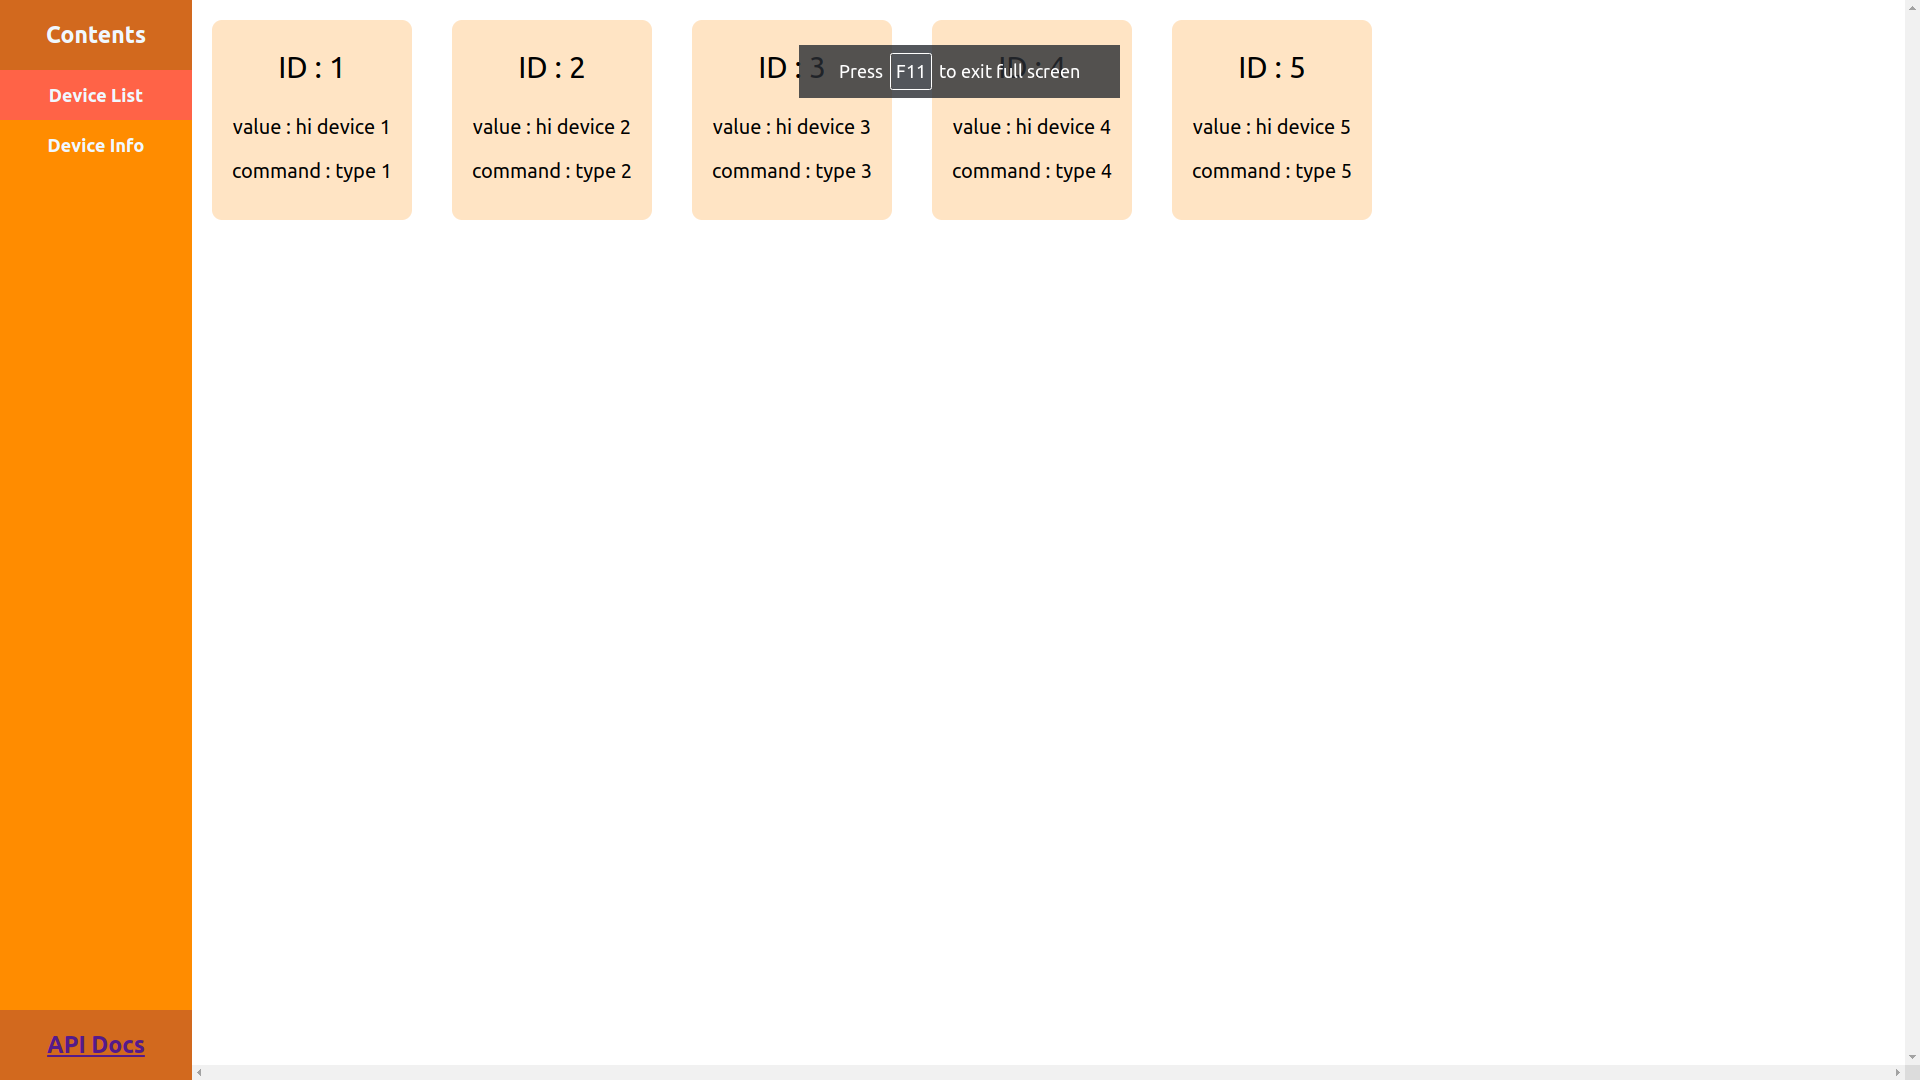
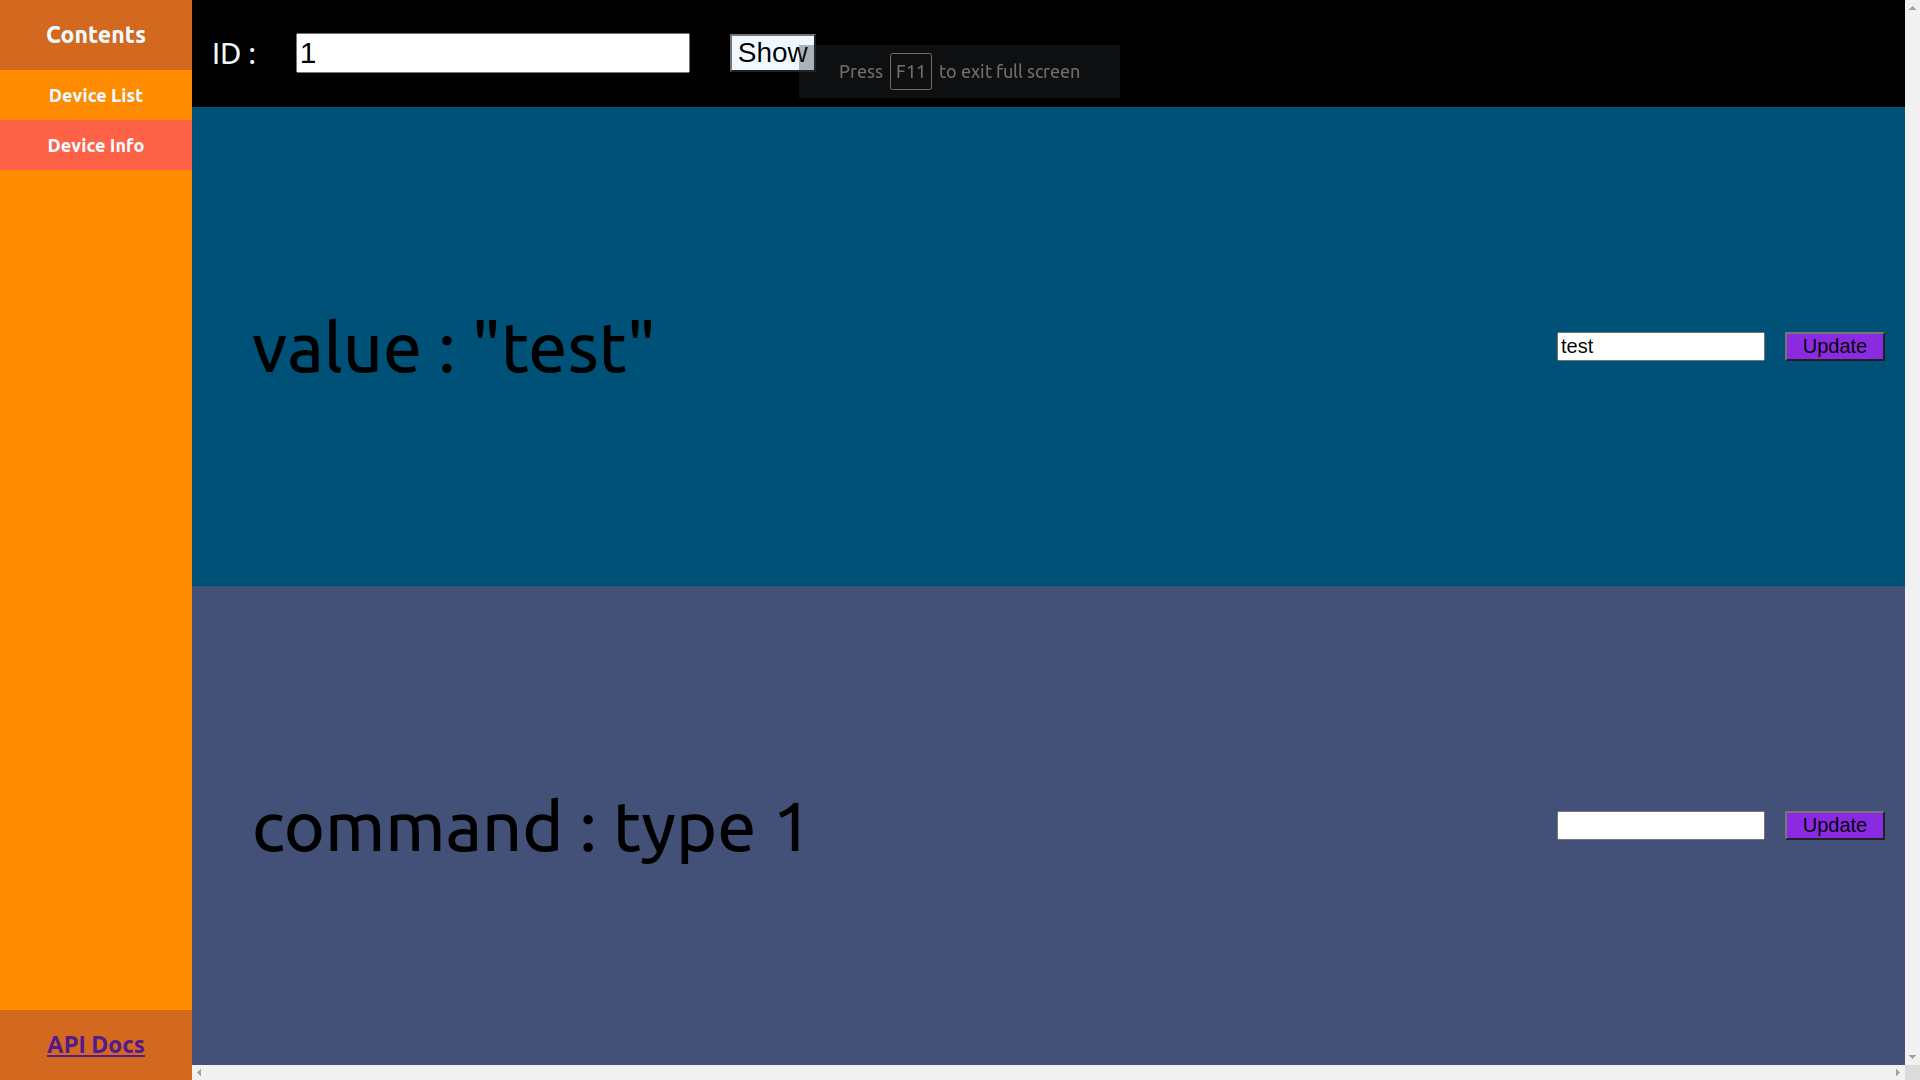
다 작성하면 다음과 같은 화면들이 나온다.
- DeviceList
- DeviceInfo
다음 포스팅에는 react 앱 배포하는 법에 대해 포스팅할 예정이다.
320x100
'웹' 카테고리의 다른 글
| 프로젝트 마무리 : CloudFront , AWS Certificate Manger (0) | 2022.02.17 |
|---|---|
| React UI 만들기 (3) : AWS Amplify로 배포 (0) | 2022.02.17 |
| React UI 만들기 (1) : 환경 세팅 (0) | 2022.02.16 |
| Spring + Kotlin API Server 만들기 (7) : 간단한 Page추가, CSR & SSR (0) | 2022.02.16 |
| Spring + Kotlin API Server 만들기 (6) : AWS EB + github action으로 CI/CD 구축 (0) | 2022.02.15 |


